Monday, November 7, 2011

#9 First Impressions

Let's start this codex review with a brief look at the beginning of the book. The fluff is an enjoyable quick read that leaves you believing the galaxy has an inevitable and ominous fate. I'm not too worried about the artistic strength of the writing, but I am glad to read there are individual dynasties with their own peculiar characters. This leaves the door open for people to really give character to their Necron armies and come up with unique fluff for their own dynasties. Moving from a faceless, soulless horde of C'tan slaves to a race bereft of unity and marshaled by leaders with memorable idiosyncrasies is a huge shift in the fluff. I'm happy for the change.

The Necron evolution continues...
Now on to the actual rules of the army. There are four Necron special rules to keep in mind when looking at the army list entries.

First we have Reanimation Protocols, the rule to replace We'll Be Back. This rule is three paragraphs long in an obvious effort to squelch any and all confusion that made its predecessor infamous. Basically, at the end of every phase you roll a D6 for every dead Necron in a unit that has at least one survivor--it no longer matters what killed the Necron. For every roll of a 5 or a 6, a model rejoins the unit by being placed in coherency of a model that did not just come back to life with Reanimation Protocols. If the unit has to make a fallback move, then you don't get to make any rolls for that phase. This still makes the Necrons very vulnerable to sweeping advance. However, since there is no more distance mechanic as there was with WBB,  you can really spread out your units to avoid multi-assaults.

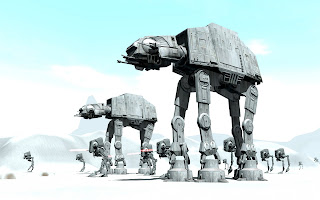
I'm reusing a picture for a post about a zombie army...
it's funny, not lazy
The second special rule is Ever-Living. This is just Reanimation Protocols for independent characters. A model with Ever-Living always gets a chance to come back regardless if there is a friendly unit around him. The main difference is, if the model is killed and is not part of a unit, then the model has to be placed 3" of its last position if you successfully roll a 5 or 6. If the model died in close combat, then it reanimates locked in combat. I don't really see a way to exploit this rule. Perhaps the most interesting part of this rule is that it can be used to cause the character to join another unit when the character comes back.

The next rule is Entropic Strike. This rule replaces disruption fields from the last codex. Any model that suffers an unsaved wound from a model with this special rule immediately loses its armor save for the rest of the game. Since most of the models with armor saves only have one wound, this rule is not particularly terrifying for infantry. However, if you hit a vehicle with a weapon or model with Entropic Strike, then you roll a D6 for each hit. On a 4+, you reduce the armor value of the vehicle by 1 on all armor facings for the remainder of the game. If any of the armor facings is reduced to a value of 0, then the vehicle is immediately wrecked. This gives Necrons another option to destroy vehicles besides glancing them to death. Entropic strike also could make any tank in the game vulnerable to assaults from strength 4 models. How funny would it be to see a Necron Warrior punch a hole through a Land Raider and cause a crater? This rule is really going to change how things are played.

Such an impressive and imposing model...
just waiting to get punked by a 10 point meltagun...=(
The final Necron special rule is Living Metal. If a vehicle suffers a "crew shaken" result, then you roll a D6 and ignore the result on a 2+; a "crew stunned" result is ignored on a 4+. I am a little sad to see that Living Metal no longer means your lance weapons, meltaguns, and monstrous creatures are ineffective. This makes Necron tanks more vulnerable to the conventional tank busters in the current meta, but at least we have a chance to shrug off shaken and stunned results to keep shooting.

Reanimation Protocols should be considered a success for simplifying the reanimation process. It has pluses and minuses compared to WBB, but it's definitely the better rule based on clarity. I'm also really looking forward to spotting the possible combinations to use Entropic Strike. Necrons have been about getting around your defenses with the inception of the Gauss rule, and Entropic Strike is a rule that stays true to what Necron offense should look like. There's not much to say about Ever-Living, and Living Metal could have been a little more exciting. I don't think losing the defense against lance and 2D6 armor penetration will be that damning for Necron vehicles...at least I hope so.

Overall I like the direction of the Necron codex, and I'm looking forward to examining each list entry and giving you my thoughts.

Friday, November 4, 2011

Thought #00008: Rising From the Grave

It's been a while since my last post. A number of personal issues arose and kept me from the more enjoyable things in life (gaming), but I feel that my life is returning to some semblance of order.

It just fits.
I have been considering how to reengage this blog, and then much to my surprise and gleeful pleasure, the Necron codex has been updated! I've been waiting for this moment for about 4 years when the first rumors started coming out.

I'm so excited to play with my dusty old Necron models, and that's why I love gaming (particularly 40k). This silly little game is exciting; it gives us all something to talk about (which is helpful for those of us who are introverted gamers); and it brings people together.

*insert warm fuzzy music*


The first one may very well be BA vs Necrons...
I've decided to start things off with a comprehensive Codex Review of the Necron Codex. This review will consist of 2 major elements and span several weeks:

1) A full-read through of the rules and units with my initial impressions and predictions

2) Battle Breakdowns where I craft a list and play-test it at the local gaming store. I will strive to play at least one game with every unit in the codex in order to highlight each unit in a "live fire exercise."

So watch out for part 1 of the codex review where I will start with the army special rules and the HQs. 

Saturday, March 12, 2011

Battle Breakdowns

I haven't posted anything in a while because I've been working on a video battle report. I want to do video battle reports a little differently than what I've seen. I think there is a lot of tactical advice that is lost in translation from the screen to the tabletop. I am going to record battles on my camera and then edit those videos with audio commentary and graphics--much like what you see when you watch NFL games.

Of course, this is a work in progress. Just look at the graphic I threw together to get this post up. I have already recorded one game, and I have learned so much for how to record my next battle report. Fortunate for me, a very good player agreed to let me record his game, and I know I have a lot of tactical lessons on film to work with.

I hope to have this video ready to view in a week or two.

Wednesday, March 2, 2011

Reach Your Killzone Part III: Setting up the Assault

Setting up the Assault:
If you charge something that big...just make sure you connect...
Many units in 40K find their Killzones are their assault ranges. A lot of units are most comfortable locked in close combat with their targets, and you have to get them there. This final method of reaching your Killzone is deceptively simple. I've seen many players treat the Movement phase as an afterthought or a necessary evil to get their hammer units engaged with their targets. Assault units need as much attention as any other unit to maximize their effectiveness. Over the years, I have begun looking at my assault units like golf balls; first I want to cover a lot of distance on the fairway, but then I try to be pin-point accurate with the putt/actual assault. During those final Movement phases before the assaults, I have kept these things in mind to help my get the most out of the assault phase: look where to connect, look for multi-assaults, and see where you will be after the assault.


I am always looking where my assault models should connect with their targets. You have a Battlewagon full of Nobz and it's pretty obvious they belong in assault. You speed across the battlefield, take a dozen Kustom Force Field saves, and it's finally time to spend one more Movement phase to get into the Nobz' Killzone and start krumpin stuff. When you pile the Nobz out of the Battlewagon, when you unload the Wyches from the Raider, when your Thunderwolf Calvary gets in range, etc., you can usually benefit from proper placement of your models to get the most favorable base-to-base connections. If your target has an independent character, move your power fists/power klaws/force weapons so you can get them engaged with the characters to kill them outright. If you want to pull your opponent off an objective, move your models far enough away to make sure only 1-2 non-essential models get into base contact so that pile-in moves are most effective (and pull those non-essential models that are closest to the objective for subsequent pile-ins). No matter what you're trying to achieve, visualize how your models need to get into base contact to get their job done.

If you plan to win the assault, stack the odds in your favor.
Assaulting multiple units has become somewhat of an art in 5th edition 40K. You can see a lot of players assault multiple units incorrectly because the rules are tedious and take some effort to do properly. The Movement phase is essential to pulling off a proper multi-assault. Ork and Tyranid players especially have to learn how to multi-assault or learn to lose a lot of games graciously. A great way to pull off a multi-assault is by moving away from your assault target and toward another unit that you wish to catch in a multi-assault. Moving this way should minimize how many of your models reach your assault target which will allow you to assault a second/third target. You can also "conga line" your unit to wrap you assault unit around 2+ units so that when you assault, your make it very easy to assault multiple units.

I also try to see where I will likely end up after I assault. Will I likely wipe the target(s) off the board? Will I need another turn or two for the assault to end? Am I trying to tar-pit a unit, and will I be able to last for a couple rounds of combat? I'm constantly asking myself questions, and it helps me a lot. If my opponent has an Imperial Guard unit on an objective in cover and I'm in position to charge him with my Tactical Marines in a Rhino, I look to see what kind of counter attack he can line up on me in the following turn. I will likely not kill many Guardsmen firing out of a Rhino, but if I'm more likely to charge, wipe the unit, and get hosed by plasma in the following turn, then I'm going to be content with shooting out of a pillbox. Part of a successful assault is the timing of the assault. If I kill that one unit of Guardsmen in assault and then lose my squad to shooting, then what have I gained? If I can time my assault so that I am more likely to survive the turn after the assault, then it's a more effective assault.

Friday, February 11, 2011

Reaching Your Killzone Part II: Minimizing Distance

Minimizing Distance:
Sometimes it pays to be bold...
Minimizing distance is the idea of getting close with short range fire support specialists to eliminate a target. The units that get close like this usually are not looking for an assault so their Movement becomes more complicated. Meltaguns are the first weapons to come to mind when I talk about short range fire support that wants to Minimize distance. Their Killzones have a small radius, but any tank that finds itself in there will soon be molten slag. Besides meltaguns, rapid fire weapons double their offensive output when they Minimize distance. As you deploy each unit, be aware of which units will operate best at short range against the target priorities. No matter what short range weapon your unit is using, Minimizing distance will be key to reaching the Killzone. Two things are crucial to short range fire support units: speed and timing

Giving the short range fire support units speed is rather simple. As you build your list, immediately allot points for transports, jet packs, or bikes. When you deploy before the game starts, give the short range units the areas of your deployment zone that are closest to the enemy or closest to cover that is closest to the enemy. Of course if you have assault units, you will need to weigh the importance of your target priorities and your units' abilities to eliminate those threats. Then you'll usually be better off just letting the most effective unit have the prime deployment spots.

...other times, you should wait for backup.

While long range specialists can enjoy Maximizing their distance to reduce return fire, short range specialists need to utterly destroy or cripple their targets to reduce return fire, and you need to know when to get aggressive to close in on those targets. Minimizing distance may require the most practice of the three movement options to reach a Killzone because it forces you to place your units within range of a myriad of threats. If you end up not destroying your targets and end up in a dubious position, you could be watching your units get torn apart in your opponent's turn. You need to practice timing the attack of your units to cause as much damage as possible to inflict maximum damage while reducing the damage taken on your aggressive units in the following turn. I don't particularly care for "sacrifice" units that only manage to kill one unit then die because they were thrown in the fire with no support. If you have to take down a high priority target and need to risk your short range unit to do so, say with Fire Dragons, then do so if it's tactically advantageous. However, with some careful maneuvering and bringing enough firepower to bear in a single turn, that sacrificial unit may live to see another round of shooting.

Don't Minimize distance without a clear plan of attack. First find target priorities, know which targets can be dealt with by your short range fire support units, decide how many units you should commit to destroying a target, then move your units to their appropriate threat range to destroy/utterly cripple the target(s) while keeping your opponent's reaction to a minimum. And make use of terrain to provide cover to your units. It's OK to hide behind a building for a turn while you move into a better position. In other words, don't come out of cover to fire one meltagun at one of two Vindicators when you can wait for your other two squads with meltaguns to join in and back you up a turn or two later.

Part III to come soon.

Saturday, February 5, 2011

Reach your Killzone Overview and Part I: Maximizing Distance


I didn't mean for this section to be three parts, but I didn't know I'd have so much to say...which I'm still not sure is a good thing. I'll post Part II in a couple of days. 


Note that I use two terms, Killzone and threat range, somewhat interchangeably. A Space Marine that can move 6" and fire a Bolter 12" has a threat range bubble with and 18" radius. His target is an Ork Slugga Boy. To kill the Ork, the Space Marine needs to start his turn within 18" of the Ork to kill it. So the Ork has a bubble with an 18" radius which is the Killzone for the Space Marine. Once the Space Marine is 18" away, the two words overlap. 


Now that I've made the effort to avoid confusion...here's my post.

Reach your Killzone:
Once you have identified the main threats of your opponent's army, you will need to assign those threats as targets to your units. You will then need to use the Movement phase to reach your Killzone or threat range from where you can attack your target. For most units this will mean choosing one of three options

A) Maximizing distance for their long range weapons
B) Minimizing distance for their short range weapons,
C) Setting up the assault


Maximizing Distance:
When you Maximize distance, you assign Killzones to fire support units from where they can attack their target while mitigating the return fire they receive in your opponent's turn. Typically, fire support units have weapons with a range of 36"+, so they can be outside of the range of most your opponent's units. The game of 40K is definitely a game of inches, and a few inches can determine if your opponent's unit can shoot or assault your fire support unit. Remember to use distance as a defence.


Fire support units will either be mobile or static. Mobile fire support units include Eldar Prism Cannons, Imperial Guard Vendettas, Ork Warbuggies, Space Marine Vindicators, etc. The aforementioned units can all move and maintain their optimal offensive output. Keep Mobile units moving, and keep your targets at the maximum range of your weapons. Spend time learning what 24", 36", and 48" look like. Be able to visualize ranges to accurately keep your weapons near the end of their range so you will hopefully be out of range of your opponent. Of course, there will come a time where it makes more tactical sense to give ground to your opponent, but have a specific reason for why you are giving ground--a good reason may be that you need to reach a Killzone to attack a key threat to your chances of winning. Always ask yourself after you move a Mobile fire support unit "What can I hit? What can hit me? Am I in the proper Killzone?" Never just move into a position to get a preferable shot without thinking through how your opponent will react in his turn. That said, sometimes the potential payoff is worth the risk. I just want you to be aware that there is always a risk, and if you can reduce the risk, then do it.

While Mobile units are becoming the norm, Static units are becoming much less common. For static units to reach their desired Killzone, they require long range weapons, good deployment, the opponent moving the Killzone to overlap your threat range, or some combination of the three. Static units would include Space Wolf Long Fangs, Ork Lootas, Imperial Guard Heavy Weapon Teams, etc. These units rely on deployment to mitigate or even nullify the need to move in the Movement phase. I want you to keep in mind three things when you deploy these units to help keep them as efficient as possible. Have a specific firing arc, realize your opponent will move, and don't be afraid to move.

I have seen players set up a Static unit in what they think is a prime firing line only to realize the area is also prime real estate for their tanks, assault units, or other units that block line of sight or offer unnecessary cover saves to the opponent. Sometimes a Static unit can be of great use denying your opponent a flank so the rest of your army can move in the other direction. Other times, you may want your Static unit to peer down the middle of the board, but just be keenly aware of the consequences that will have on the rest of your army.

Realize your opponent will have to move at some point (9 times out of 10). If you're opponent is castled up in the back left corner and you have to choose whether or not to line up on him with your assault units or the Static fire support, then give ground to the assault guys. Rest assured that your opponent will be forced to move his castle. Anticipate your opponent's likely route with his units, and set your Static with prime line of sight of the unoccupied area. You may force your opponent to abandon his plan.

Above all else, realize that your Static units still have the ability to move. Don't simply gloss over the unit in the Movement phase because you figure they are an immobile statue. During the course of the game, the firing lines can get cluttered with wreckage, massive assaults, and undesirable targets. If you are in a near worthless position and can reach a better position in a turn or even two turns of movement, then move. Warhammer 40K is a dynamic game where goals and targets can change with every turn. If your Static fire support unit does not have a good target for the Shooting phase, ask yourself if there is anything else the unit can be doing. Whether it's moving for a better position, moving to contest an objective, or even just staying still, you need to be using the unit in the best way possible every turn.

Basically, Maximizing distance is a defensive approach to fire support. You should be looking for  where your Killzones and threat ranges overlap just outside of your opponent's reach so you can make all of the shooting dice rolls and none of the armor saves. If you have to move into your opponent's range for a good shot at a priority target for your fire support, then try to mitigate the risk. If there are simply no good targets, and the risk level is high, then look for ways to move outside your opponent's threat range.

Finding My Routine

I'm posting a few days later than what I wanted. I'm still trying to find a routine to sink into. I think I'm going to try to post once or twice a week. I guess blogging is a balancing act of cranking out posts at a fast enough rate to keep passerbyes interested but slow enough so that I don't completely drain myself of worthwhile content. I'm still learning, but I'll get the hang of it.

I'll be finishing up part 2 of my Killzone strategy later today. I really hope these ideas help someone out there.